
Last updated November 17, 2026
 Hardwood
 Engineered hardwood
 Luxury vinyl plank
 Laminate
 Porcelain tile
 Carpet
 Shaw
 Mohawk
 COREtec
 Pergo
Free in-home measure and written estimate: Shaw, Mohawk, COREtec and Pergo lines compared on your own rooms, with carpet, tile, vinyl plank, laminate and hardwood laid out side by side
Get your free estimateHow to Prepare Your Home for a Flooring Installation in Las Vegas
A crew that walks into an unprepared room doesn’t quietly absorb the time. It comes out of somewhere else. Furniture that should have been moved gets shifted at a pace nobody planned for, baseboards stay on longer than they should, and the careful part of the installation, the part that determines whether your floor sits flat and tight for years, gets squeezed. This guide treats prep as project management with a calendar, not a day-of checklist. By the end, you’ll have a timeline, a clear division of labor, and a feel for how Las Vegas’s dry air and desert housing change the schedule.
Quick Answer
To prepare for a flooring installation in Las Vegas, start about two weeks out: clear the room, arrange where new material will be delivered and stored, keep your HVAC running at a normal temperature, and remove wall hangings and valuables. During the final 72 hours before installation, confirm access, protect adjacent surfaces, and settle on a spot in the home where pets and kids can stay. After the last plank or tile goes down, wait 48 hours before heavy foot traffic and furniture.
Styles & brands we work with
- Hardwood
- Engineered hardwood
- Luxury vinyl plank
- Laminate
- Porcelain tile
- Carpet
- Shaw
- Mohawk
- COREtec
- Pergo
Table of Contents
- The Prep Timeline: Two Weeks to Done
- Acclimation in Las Vegas’s Dry Air
- What to Remove Before the Crew Arrives
- HVAC Management During Installation
- Protecting Walls, Cabinets, and Door Frames
- The First 48 Hours After Installation
- Which Floor Types Need Different Prep
- Common Mistakes to Avoid
The Prep Timeline: Two Weeks to Done
Prep starts about two weeks before your install date, and yes, that feels early. That’s the point. Most of what goes wrong in a flooring project isn’t the installation itself; it’s the bottleneck created by material that showed up late, furniture that had nowhere to go, or a room that couldn’t be cleared because the schedule wasn’t mapped out. In our experience, homeowners who follow this sequence consistently report a smoother job.
- Two weeks out: Confirm your written estimate, flooring selection, and install date. Book a place for animals and children to spend install day elsewhere or in a room that isn’t being worked on.
- Ten days out: Schedule material delivery early enough that boxes can sit inside the home before installation. This is where the acclimation window lives (see the section below). Arrange furniture relocation: either another room, the garage, or a rental storage unit.
- One week out: Clear closet floors and any built-in storage the crew will need to work under. Remove electronics, lamps, and anything breakable. Empty the room down to furniture you can’t move alone.
- Three days out: Confirm the HVAC has been running at your normal temperature. Remove wall art, mirrors, and floating shelves near or in the work area. Confirm access to the room, including whether the crew will be coming through a sliding door or front door.
- Day before: Move remaining furniture out (or arrange a helper). Clear the floor, remove throw rugs, floor lamps, and any plants. Confirm the install window in your estimate.
- Install day: Have the room empty, the HVAC at normal, and the pets away. Leave a note or call if the door access details have changed.
A dry desert valley handles this timeline differently than a humid climate. Every material in your home is essentially sitting in a moisture environment, and in Las Vegas that environment is dry. When a wood, laminate, or luxury vinyl plank product gets delivered from a warehouse or truck that spent hours over hot asphalt, it needs time to settle into your home’s conditions. If boxes are brought into a finished room and installed before that happens, expansion and contraction can make the planks separate or curl in coming months.
Acclimation in Las Vegas’s Dry Air
Acclimation is the process of letting new flooring material adjust to the temperature and humidity of your home before it’s installed. In Las Vegas, this window is not optional. The chasm between a warehouse in summer and a climate-controlled home can be significant enough that your new floor moves visibly after install if the material was rushed.
Here’s what to know. When material arrives, it should be brought inside, laid flat according to the product’s instructions, and left in the room where it will be installed. Boxes should not stay stacked in a garage where temperatures swing wildly, and they should not sit in a room with no HVAC. The point is to match the material to the room, not to the truck.
How long? That depends on the product and the instructions that come with it. Many luxury vinyl plank and laminate products from brands like COREtec, Pergo, LifeProof, or Mannington specify a 48-hour window and some specify longer. Hardwood typically asks for longer. The correct answer for your specific floor is on the box, the spec sheet, or in the product documentation the installer should confirm. At the estimate visit, we review those instructions with you, because it’s the written plan (not a general guideline) that schedules your install day.
Why the dry air matters: in a Vegas summer, outdoor humidity can plummet relative to interiors running air conditioning, and in winter, heater use dries interiors further. Planks that were cut and installed at a different humidity from the one they live in can gap at the seams. Acclimation absorbs most of that risk in advance, but only if the material is inside, unstacked, and at room temp for the full window before anyone lifts a pry bar.
Schedule material delivery accordingly. If your box says 72 hours, the material needs to arrive three days before install day, not the morning of. This is one reason we recommend scheduling the delivery separately, so the clock has time to run.
What to Remove Before the Crew Arrives
This section is the most commonly undercooked part of prep, and it’s where the biggest surprises happen. A flooring crew is not a moving company, and most written estimates spell out what’s assumed. Here’s what to work through so install day isn’t a negotiation.
Furniture and Belongings
- Small to mid-size furniture: Remove it from the room entirely. Sofas, chairs, side tables, dressers, bed frames, and nightstands block the install path.
- Large furniture: Some crews will move heavy pieces for an additional fee if it’s agreed in the estimate. Otherwise, arrange movers or helpers. This is where a written scope saves conflict.
- Wall hangings, mirrors, shelving: Remove anything mounted to walls or sitting on floating shelves. These are yours to handle; it’s not a moving task.
- Electronics: Take out TVs, gaming consoles, computers, and anything with cords that could snag.
- Closet contents: Flooring replacement includes closet floors. Empty closet floors completely and move the contents to another room.
Appliances and Fixtures
- Refrigerators and freezers: If a kitchen floor is being replaced, the refrigerator needs to be moved out before install. That’s typically arranged separately with a mover or appliance specialist, but confirm the plan at the estimate.
- Washer and dryer: Same story. The floor under them is being replaced, so they need to be disconnected and moved.
- Toilets and vanities: In bathrooms, tile installation typically requires removing fixtures. Confirm this scope at the estimate; tile installation planning includes it.
Door Thresholds and Baseboards
Door thresholds that meet the old floor at the wrong height may need to come off or be replaced. Baseboards often do too, especially when the new floor’s thickness differs from the old one. Whether the installer removes them or you do is a decision that should be in the written estimate. If the baseboards stay, the new floor has to meet them cleanly, which limits some installation options.
Old Carpet and Tack Strips
If your old flooring is carpet, the tack strips along the walls need to be pulled before new flooring goes in. This is the installer’s job, but confirm it’s covered in the estimate. Old carpet padding and staples also come up. The room should be cleared of the old system entirely before new material begins.
HVAC Management During Installation
Keep your HVAC running at a normal temperature for the entire week before installation, and don’t change it on install day. This is the second-most-overlooked prep item after acclimation, and it feeds directly into the first.
Here’s why. If the material was acclimated at 76°F for three days and then the crew installs it while the HVAC is off and the room heats to 90°F, the planks expand as they’re being cut. When the system comes back on, they shrink and gap at the seams. The floor is then installed at the wrong size.
A dry, hot climate exaggerates this. Las Vegas interiors without cooling can heat fast, and the differential between an air-conditioned room and a warm garage in the same home is significant. A simple rule for the install week:
- Set the thermostat to the temperature you normally keep the home at. Not one degree warmer, not cooler.
- Run the HVAC during the install itself. Don’t turn the system off to keep dust down; most installers will handle dust with bags and containment, and the cool, dry air helps.
- If you’re replacing flooring during a vacation or work trip, don’t let the house get hot. Set the system to hold its normal temperature even while away.
- If you have a whole-house humidifier, don’t run it during install. It changes the humidity environment the material adjusted to.
One more thing that applies to homes with permanent finishes: adhesives and grouts set according to their own instructions and product temperature windows. The written estimate and product documentation set those specifics. Follow them.
Protecting Walls, Cabinets, and Door Frames
Most of what a crew drags through a room is a real hazard to adjacent surfaces. Plywood underlayment, boxes of tile, planks of luxury vinyl, and rolled carpet can all mar walls and clip door frames. Prep for this is simple but it has to be done before day-of.
- Clear a path. If the crew is moving material from a garage, driveway, or front door into the room, protect that path. Remove furniture, rugs, and anything breakable from doorways and hallways.
- Check the doors. Interior and exterior doors need to open fully for the crew to pass through. Remove anything blocking travel, and don’t leave low-hanging decor or hanging plants.
- Protect cabinets. Cabinets in kitchens and bathrooms don’t come off; the floor runs to them. Make sure cabinet faces are clear of items being stacked against them.
- Pull wall art near doorways. Frames that hang at the height of the door swing can be hit.
- Move area rugs. Every rug in the work area comes out.
We can’t guarantee a fully damage-free job; flooring is a physical trade. But the pieces most likely to be struck are the ones nearest the room’s entry. Clearing the path and making sure heavy items don’t have to contort around a table or dresser is the single highest-value prep step.
For tile flooring installation, there’s a little more to know. Tile cutting creates a fine slurry and dust, and the room is off-limits while the surface cures. Plan the room’s contents to be elsewhere for that stretch. This is also for carpet installation: the carpet is cut to fit on-site, so the room needs to be empty and edged, and that includes closet floors and under beds.
The First 48 Hours After Installation
The 48 hours after a flooring installation are the most overlooked window in the whole project. A floor that’s been installed well can still be pushed, shifted, or surface-marked if it’s met with heavy traffic and furniture too soon.
- Keep foot traffic light. Anyone who needs to walk through should do so in socks or stocking feet. No shoes until you’ve checked with the installer.
- Wait to move furniture back. Heavy furniture on a fresh floor can leave depressions; felt pads help on luxury vinyl planks and laminate. Plan the room to stay empty for at least two days.
- Don’t place area rugs. Rugs trap moisture and can interfere with a fresh finish’s cure. Wait at least 48 hours, and longer if the underlayment or adhesive calls for it.
- Don’t mop or steam clean. New flooring surfaces shouldn’t be washed while they’re setting. Sweep only if needed, per the product’s instructions.
- Watch the HVAC. Keep it at normal temperature, not warmer or cooler, during this window too. The first day is when acclimation and install conditions are still settling.
- Inspect, then relax. Walk the floor and check that all seams, edges, and door transitions look right. Most products will reveal a small issue (a slight gap, a slight lift) in the first day. Note it and call.
The 48-hour window is approximate. Some products and some adhesives ask for more. The written documentation that came with your flooring sets the number, and we confirm it for you at the estimate and again at install.
Which Floor Types Need Different Prep
Prep differs by flooring discipline. Here’s the breakdown for the three floors we handle.
Carpet Installation
Carpet is the most forgiving install in terms of dust, but the room must be empty and clear of the old carpet before the new one goes down. Carpet is stretched to fit, so the room needs to be unmounted: full furniture removal, closet floors cleared, tack strips removed, padding removed. Carpet installed over a slab in a desert home also benefits from a check of the slab’s condition at the estimate. If you want carpet in a Las Vegas bedroom, the prep work is mostly about clearing the room ten days out.
Tile Installation
Tile is the most involved prep, and it affects adjacent rooms. Material needs to sit inside before install (tile doesn’t “acclimate” the same way as wood, but it still shouldn’t go down cold from an outdoor pallet). Fixtures may need to come out. Adhesive and grout dry on a schedule the product documentation defines, so the room’s down-time is longer than a carpet install. Plan for the room to be fully empty and off-limits for the length of the job.
Hardwood Refinishing
Refinishing doesn’t need material acclimation the way installation does, but it does need almost everything else: full clear-out of the room, wall coverings down, HVAC at normal, and careful protection of the path. This is the service where the craft behind the company is most visible. Refinishing is a dedicated service here, not an add-on, and it’s a genuinely skill-intensive piece of work. There’s also less disruption than a full replacement, which makes Las Vegas a good fit for the service: many homes with existing hardwood can often be refinished rather than replaced, depending on the wood’s thickness and condition, checked at the estimate. When we look at a floor for refinishing, we evaluate whether the wood has enough top layer and whether existing stain or finish will be a match; not every floor can be refinished, and not every stain will match a sample.
Common Mistakes to Avoid
- Delivering material same-day. In a hot desert climate, material needs the acclimation window on the box before install, not the morning of. Schedule the delivery days earlier.
- Leaving furniture for the crew. It’s not a moving service; expect to move it yourself, hire movers, or confirm moving scope in the written estimate. Same for closets.
- Turning the HVAC off to keep dust in. Dust bags and containment handle dust; shutting off the system changes the temperature the material acclimated to and can cause seams to shift. Run the system normally all week.
- Skipping baseboard and threshold planning. These details are not day-of decisions in most jobs; work them into the written estimate. New floor thickness can dictate whether baseboards come off.
- Mistaking tile and carpet for the same prep. The two installs have completely different timelines. Tile needs dust containment and a longer cure; carpet needs a fully empty room and old tack strips removed.
- Moving furniture back too soon. Wait at least 48 hours, and longer if the floor’s documentation says so. Heavy furniture and area rugs are the biggest reasons a new floor shows early marks.
- Planning a flooring project for a week you’ll be traveling. If nobody’s around to confirm the delivery, cool the house, and check the install itself, prep for a smoother window. The written estimate sets the install date, so plan a window that gives you room to be at home.
See the difference
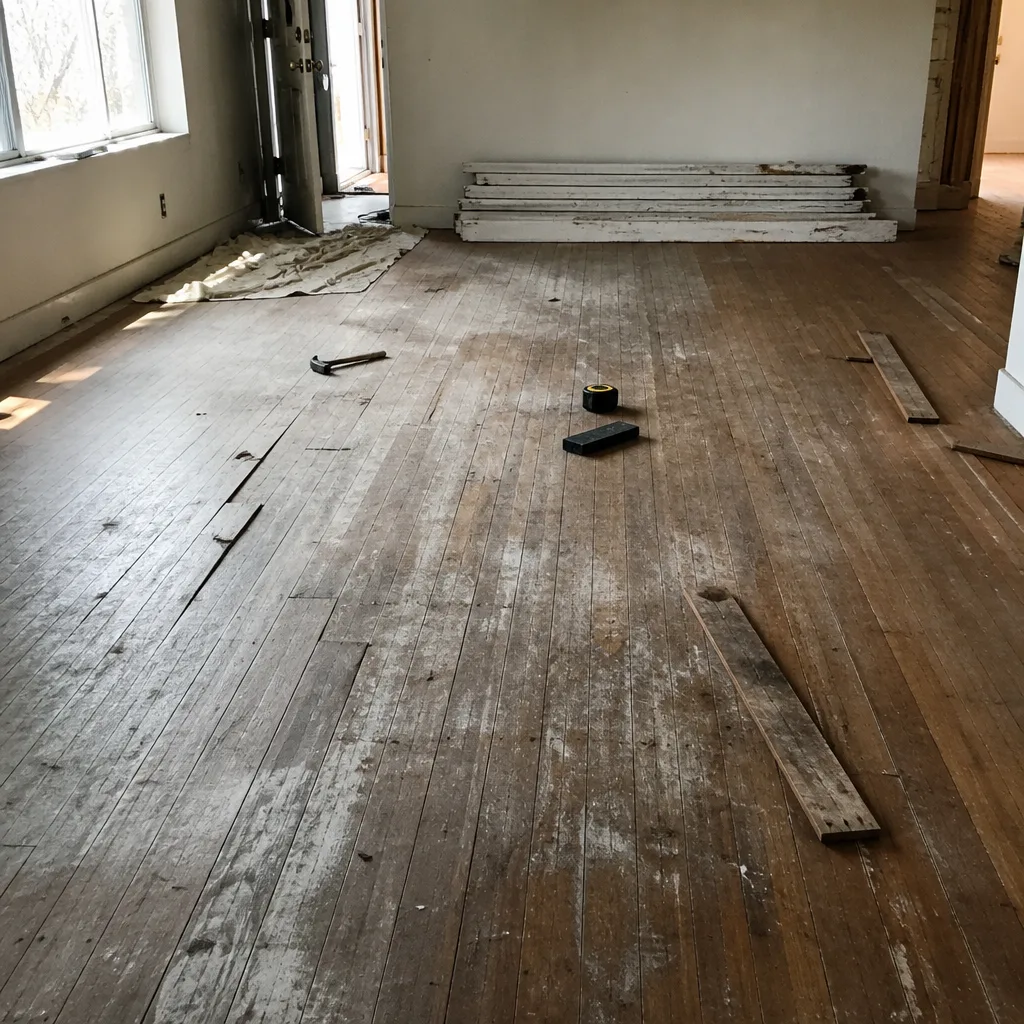 Before
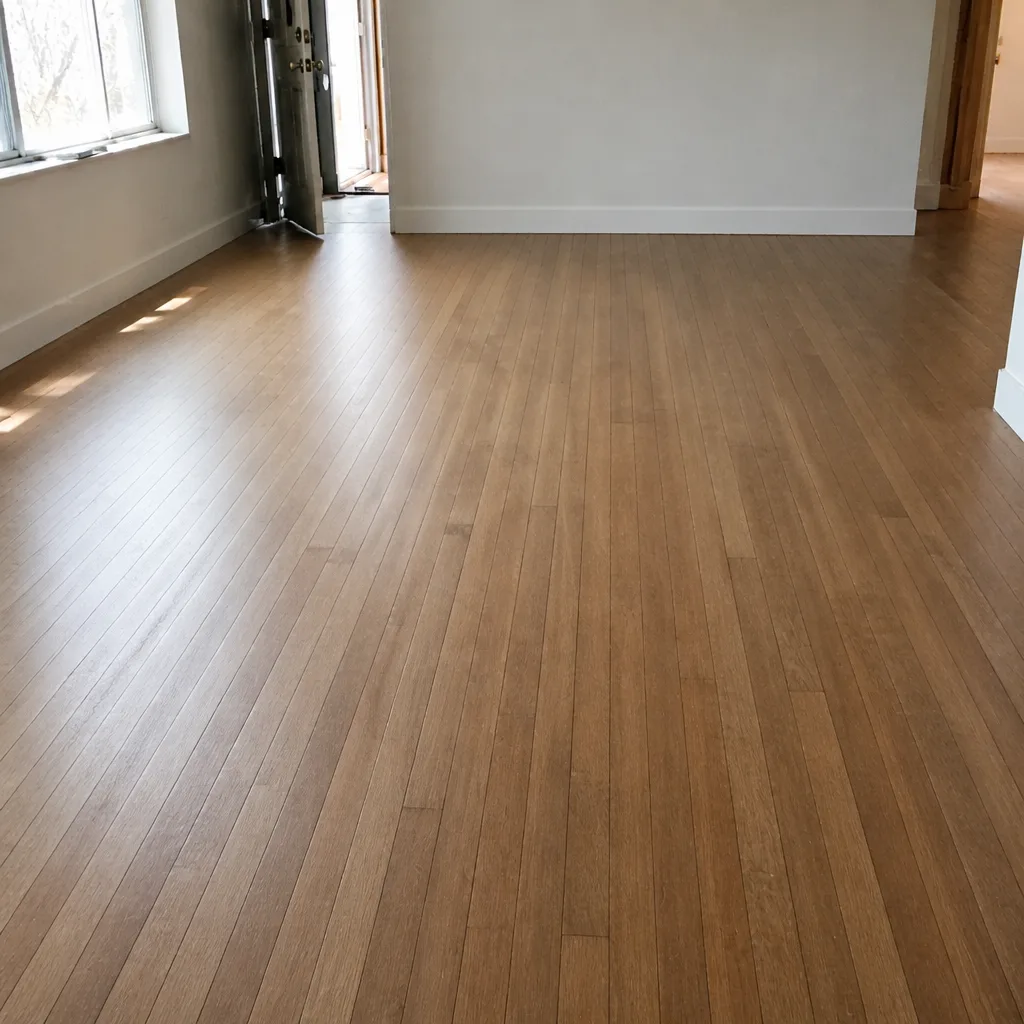 After
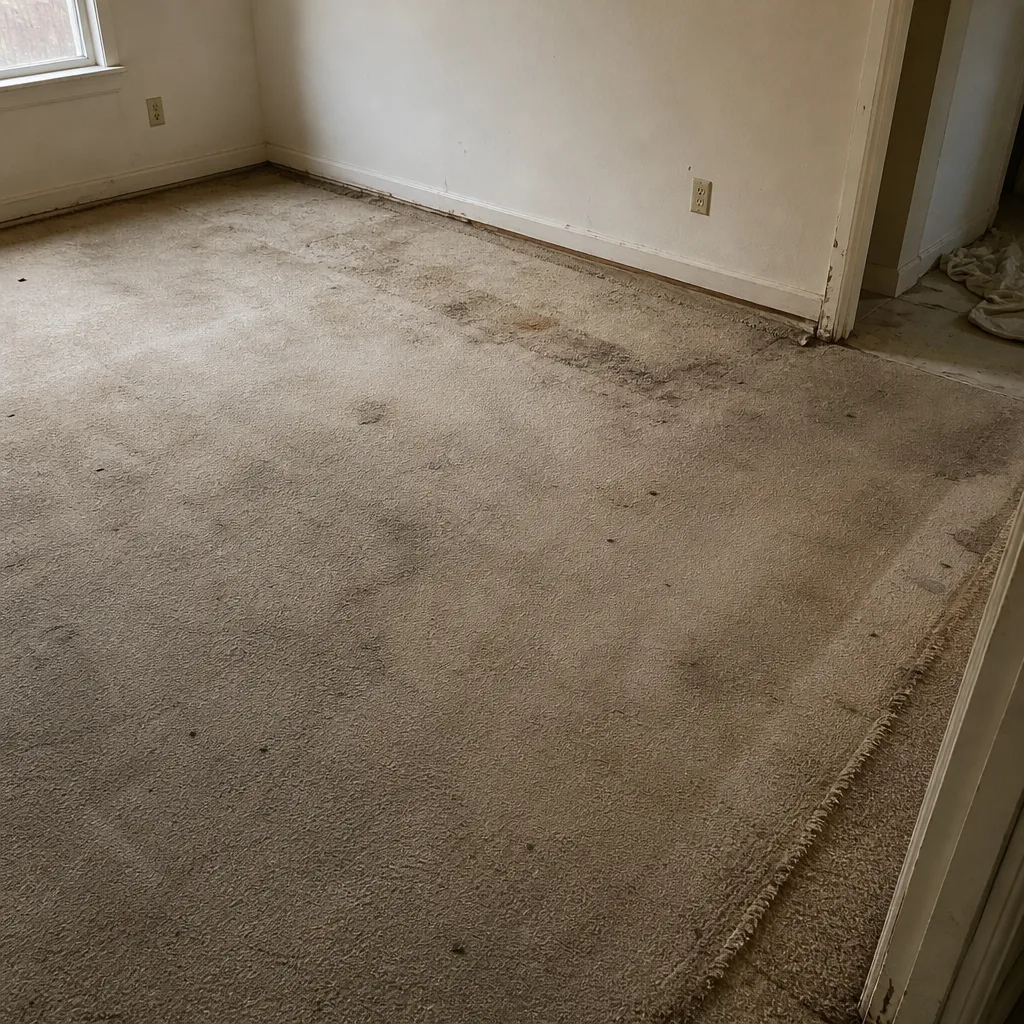 Before
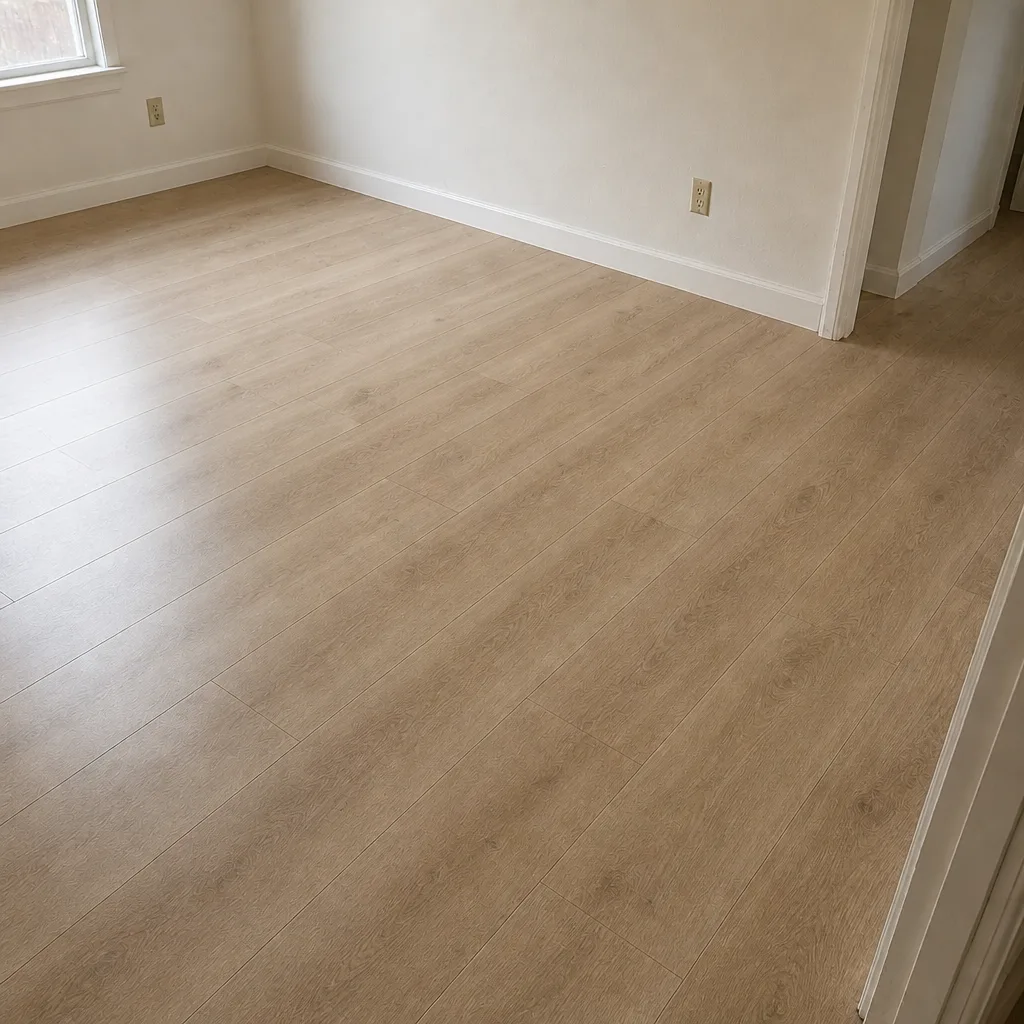 After
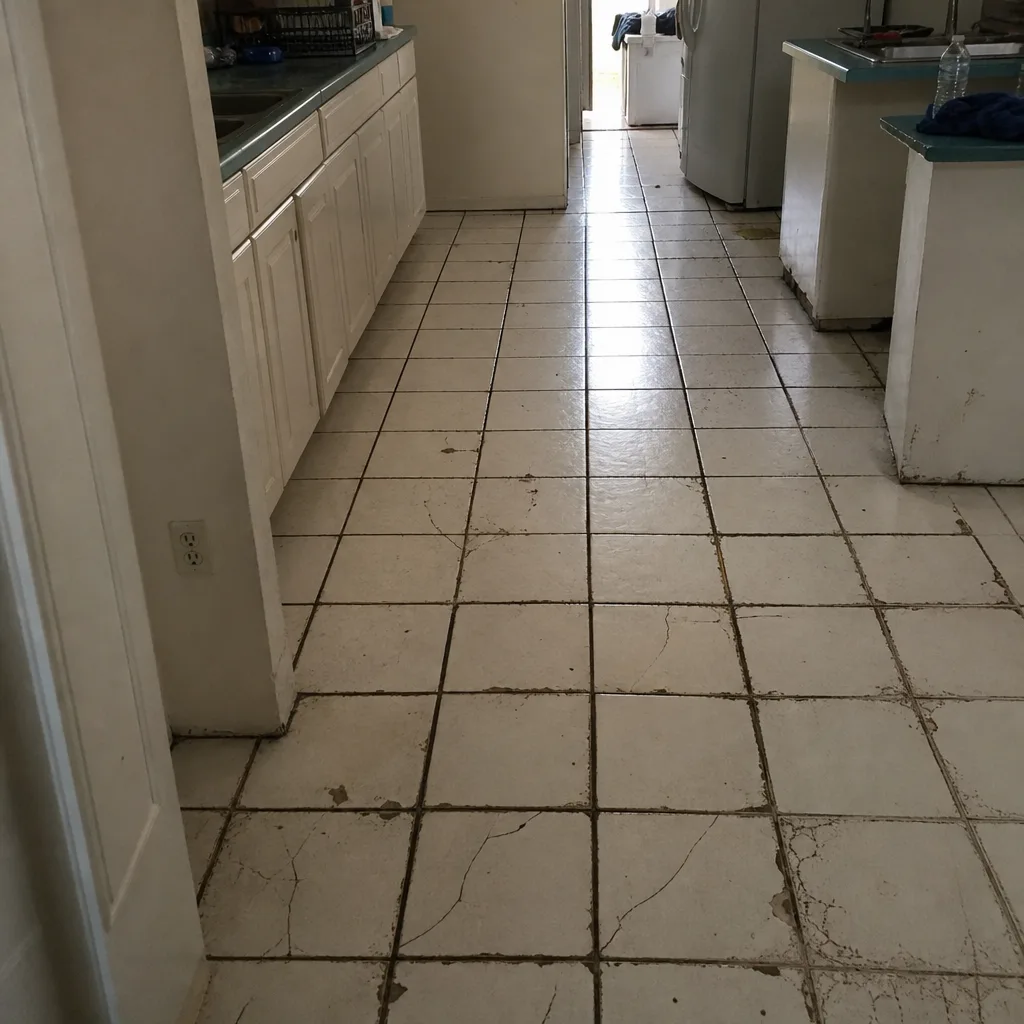 Before
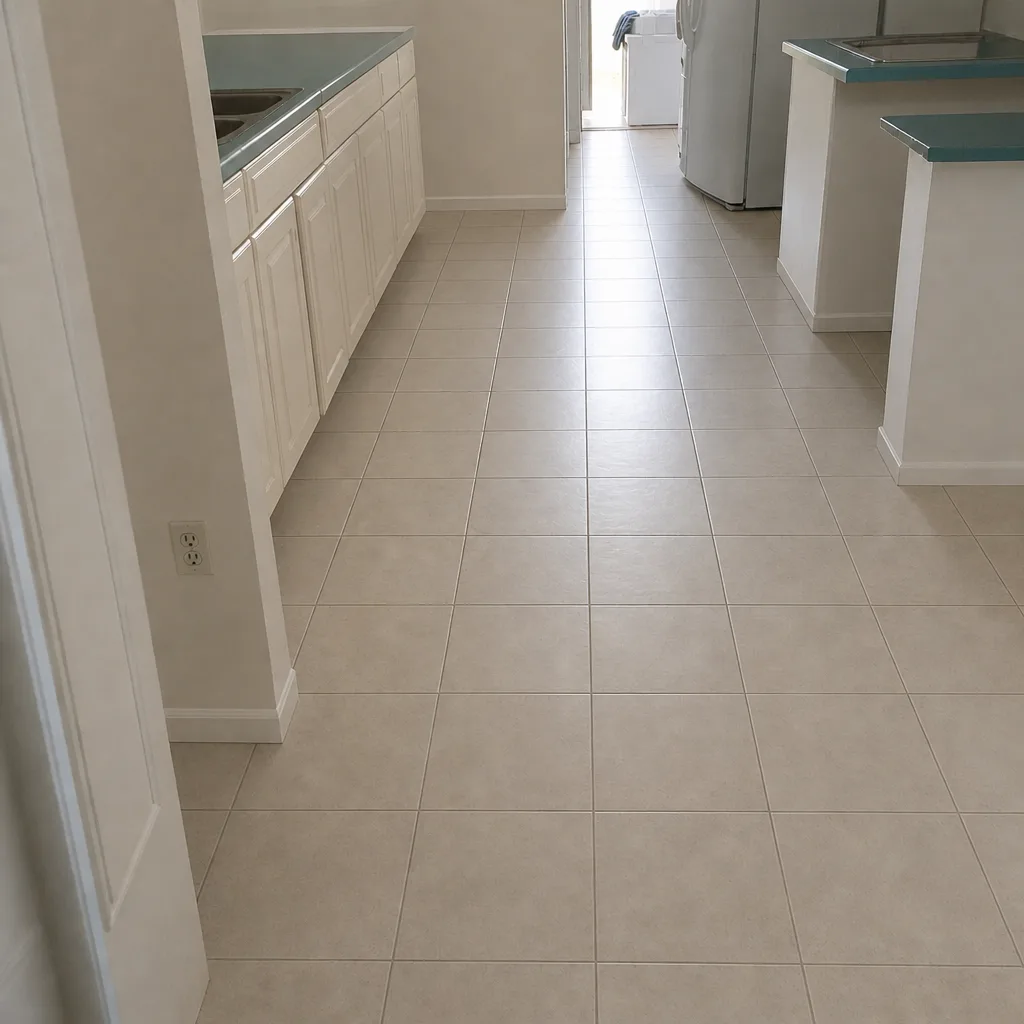 After
When to Call a Professional
If you’re comfortable with a few of the simpler jobs, you can manage the prep yourself: moving furniture, clearing closets, pulling wall art, and confirming your HVAC settings. But call a professional when the job involves removing old flooring (especially tile or glued-down surfaces), when a slab shows abnormal conditions at the estimate, when the room’s layout includes door thresholds and transitions, or when the project is a whole-home renovation that needs one coordinated install. Those are also the cases where the written estimate protects you. Floors Las Vegas offers free estimates in Las Vegas and can help you map out the timeline before material ever arrives. Our technicians have up to 11 years of experience, and our brand portfolio gives you nine trusted lines under one specialist: carpet from Shaw and Mohawk, luxury vinyl from COREtec and LifeProof, laminate from Pergo, premium resilient from Mannington, and tile from Daltile. One call, one schedule, one written estimate. Dial (844) 761-9353 to start it. We answer 24/7. Fast dispatch from 7am to 7pm, Sunday through Friday.
Frequently Asked Questions
Deliver material several days before install day, so it can sit inside at normal room temperature for the acclimation window the product requires. In Las Vegas’s dry air, rushing this step is the most common cause of gapping or curling after install. The exact window depends on the product; check the box and confirm it in the written estimate. Call (844) 761-9353 to schedule your free estimate.
Plan to move furniture yourself, arrange movers, or confirm in writing what the crew will move. Flooring installation isn’t a moving service, and assumptions about furniture are the leading cause of install-day delays in Las Vegas. Clear closets and remove wall hangings in every room being floored. Call for an estimate and we’ll spell out exactly what’s included.
No. Keep the HVAC running at your normal temperature before, during, and after install. Turning it off changes the room’s temperature and humidity and can cause planks to shift. Dust should be managed with bags and containment, not by shutting the system down. Call (844) 761-9353 for a free estimate.
Wait at least 48 hours after install for heavy foot traffic and furniture, and follow the product documentation. Rugs come after the floor has settled and any finish or adhesive has cured according to instructions. Actual timing depends on the product. Call (844) 761-9353 for an exact timeline on your project.
Often not. Old carpet tack strips and padding need to be removed before a new floor goes down. On tile, the old surface usually has to come up first. Whether any existing tile or slab surface can be prepped rather than replaced is checked at the estimate. Call (844) 761-9353 to arrange a free estimate.
One company handles carpet installation, tile flooring installation, and hardwood refinishing, so the prep timeline can be coordinated across the whole job. That’s the advantage of a full-surface specialist; you don’t have to time two separate crews around the same room. Call (844) 761-9353 for a free estimate.
The Bottom Line
Preparing your home for flooring is a project management task, not a race to install day. Clear the room early, deliver material ahead of install so the acclimation window has time to work in Las Vegas’s dry air, keep the HVAC at normal temperature, protect the path and adjacent surfaces, and wait at least 48 hours before foot traffic and furniture return. The written estimate is the single document that sets your final price and timeline, so work through it before install day. When you’re ready to plan a project, we’re here to walk you through it at Floors Las Vegas, with free estimates and one team covering carpet, tile, and hardwood refinishing. Call (844) 761-9353 to schedule yours.
Written by the team at Floors Las Vegas.